
If your social media streams are like mine, you have seen quite a few super-bloodmoon eclipse images go by. And rightfully so, it doesn’t happen every day that we get a supermoon, a lunar eclipse AND a blood moon. It will happen again in 15-20 years.
I figure this post might have been titled “What I learned shooting the superbloodmoon”, but I went with something more…uh…clickable 😉
A few random facts… supermoon is a bit of an exaggerated term. Is the moon bigger? Yes it is. Is it super sized? Well, not like those McDonald’s fries that give you way more cholesteral. One of the best descriptions is if you look at a quarter about 8 feet from you, that is the regular moon we see. If you move that quarter 5 inches closer to you, that’s the supermoon. Sadly, those images you see with huge moons over a city covering 95% of the sky, well, that’s not really what we get.
Ok, enough of the random google facts… but before I get started, these images are no where near what astrophotographers get. There isn’t anything “oh my god” in these images, just a bit of fiddling and fun on a cool fall-ish night. 😉
I wasn’t planning on taking any photos, just wanted to sit and watch for a bit. But I got a message from a friend that just say “Supermoon photo challenge is on”. Allllrighty then! I’ve never photographed the moon, so why not start now?
After it all being said and done, it was waaay harder than I thought and I learned quite a bit from my few hours sitting on my neighbor’s balcony (mine had too many trees).
I made my images mostly with a Canon 5D Mark III and a 70-200mm lens, mounted on a tripod.
Exposing for the moon
Photographing the moon and an eclipse are two totally different things for exposure. When the sun lights the moon, there is plenty of light for proper exposure. The image below was photographed at ISO 100, f32, 1/4 second shutter

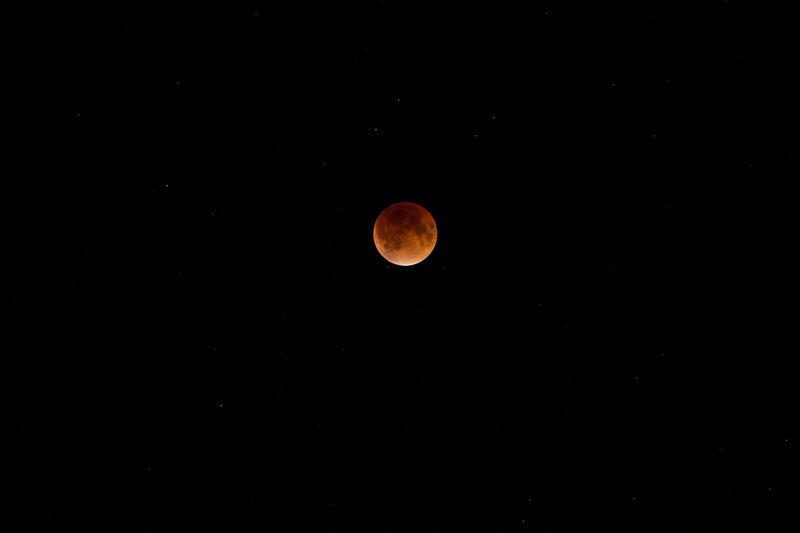
When the eclipse hit, the settings totally change as the light is next to non existent. This is where having a good dSLR will help as you have to raise ISO (more on that later). The image below was at ISO 400, f10, 5 second shutter

And this was towards the start of the full eclipse when there was still some sort of light.
A suggested f/stop should be between f/8 and f/11. Most lenses are notorious for not being at their sharpest when they are wide open (f/1.4, 2.8,..). And when you are over f/16, lenses get less sharp.
In typical night photography, we usually use long shutter speeds to capture the light and allowing to keep a low ISO. It makes for nice, crisp and clear images. But that is not so in astrophotography! There is a rule (I learned of after the fact) that is called the 600 rule. A simple rule that says to get an image as sharp as possible without any astral mouvement, your shutter should never be longer than 600 / true focal length. True focal length simply takes into account if you have a crop camera or are using a teleconverter.
In my shooting last night, I was mostly at 200mm, so that means that anything slower than 3 seconds (600 / 200) and I’ll get mouvement from the moon. It may be far away, but it still moves quickly in the sky. If you compare my two images above, the second one was at 5 seconds, hence the reason the image isn’t as sharp.
I took some images with my x1.4 teleconverter, so my effective focal range was more 280mm. I should of been at 2 seconds or faster, according to the 600 rule. When to break the 600 rule? I assume that if you want star trails, then this is when you break the rule.
Bring that ISO up
I was having some pretty bad results during the night. I chalked it up (and still somewhat do) to the constant wind that was blowing and it shaking my tripod. At some point, near the time of the full eclipse, I decided to bring my ISO up! I mean, I cover music concerts where I never hesitate to shoot at an ISO of 3200 or even 6400, so why not do so now?
So naturally, by bringing my ISO way up, my shutter speed was within the 600 rule and bam, I got a sharper moon. The image below was at ISO 6400, f/10 and a 2 second exposure. Look at those pretty stars!!
My other images were pretty similar to the one above. I tried various ISO settings (1600-25,000) but in all honesty, I was starting to get a little bit bored. It is cool and all to see, but I guess I have a short attention span. So I started playing around with my lens and did what is called lens zoom pan – well, that’s what I call it. It consists of doing longer exposures using a zoom lens and physically zooming during the actual photo.
The result isn’t stellar, as zomming the lens created lens shake, but it is something else to explore in 2033. The image below was ISO 800, f10, 8 seconds and I zoomed out during the photo.

Keeping your camera stable
I don’t know of anyone who can hand hold a camera and not move at all (and keeping in mind that breathing causes some motion) for 3 seconds. That is why a tripod is a must.
While having the camera on the tripod, you can cause shake by simply pushing down the shutter button to take the image. If you don’t have a remote to trigger the camera, you should at least have a timer… you know, that thing that you parent’s used when they wanted to take a family photo at Christmas where they would hit the button and run to be in position? Yeah, that thing. dSLRs often have a 2 second and a 10 second timer. Using the 10 second timer is a bit of overkill… the 2 second timer should provide enough time for the camera to settle after clicking the button.
No tripod? No problem. Find a ledge you can rest the camera on. One of my favorite images of Prague at night, with a train leaving the train station was done without a tripod. I rested the camera (very safely) on a ledge over the train station and used the 2 second timer.
My arch enemy was wind. A faster shutter should of helped for the wind. As would putting a weight under my tripod (I usually hand my camera bag underneath to provide some downward gravity style weight).
Thinking about more than the moon
As most people, I was focused on getting images of the moon. That meant maybe a few stars, but mainly a black background. Some of the more compelling images I have seen are where the moon is in a scene… peaking between two buildings, in a field, reflected on water. So, like with any other images, thinking of where your moon will be is important.
Thankfully I didn’t head to Mont-Royal last night as I was told cars were triple parked and the place was packed. Finding a spot that is a bit different than the easy is fun.
The only extra I had was when the clouds rolled in. Instead of packing up, I snapped a few shots, kind of hoping something that would be worthy of a horror movie would happen but I didn’t really get much.

What did I learn?
Shooting something totally new is a great way to challenge yourself
Stability is key
Astro photography can be a pain and has lots of calculations
Rules are always meant to be broken, but only when you understand why you are breaking them
Getting out and shooting is way more rewarding than reading about it on facebook. 😉
Is this the be all and end all of guides? Hell no. Are there missing items and things that I haven’t mastered? Hell yeah. As photography is not just my job, it is also my passion, I figured I’d post this up anyways 😉
Thanks for reading!!