

Here is the output of an image I almost overlooked from a photowalk a few days ago. I was out doing some street photography, but as you walk around, you notice things, little details. The silhouettes of the people in the back were what caught my eye in this scene. The sun was setting, so the light was a bit warmer and I was liking how the shadows were falling all around, and how the light was hitting the buildings on the right giving such crisp detail. The bit of light that was going down the street gave it a somewhat of a creepy feel, made me think of a western movie where people are walking into the sunset. Yeah, I have an imagination like that. It can actually get kinda scary sometimes.
My main problem is that I only had a wide angle lens so I was pretty damn far for this shot. But I took it anyways. I also had about 2 seconds to get the settings and everything done right, else the people would of taken a few more steps and would of been lost in the rest of the scene.
When I do photowalks, I’m not minded that I’m going to sell my images so I need to be perfect, have the best resolution and bla bla bla. I’m shooting to have fun! So if I have to heavily crop, or if I have to post process an image to have it match my vision, so be it! If I can’t print it 24×36 without any pixelation, who cares! My eye, my vision, my rules. 🙂 Much prefer that than carrying 5 lenses around in a bag and have to switch out… which totally defeats the purpose of quickly shooting things as they happen… and also makes my back happy.
So I decided to make a blog entry taking the image from start to finish. (Well, also because it’s 2:00am as I write this and my neighbor’s party isn’t over yet)…. Not every step (that would be boring as hell for most of you), but at least show you the start, the middle and then end. You always get to see the final product and many times, with images that are processed like this, the image starts from a regular image that anyone would take.
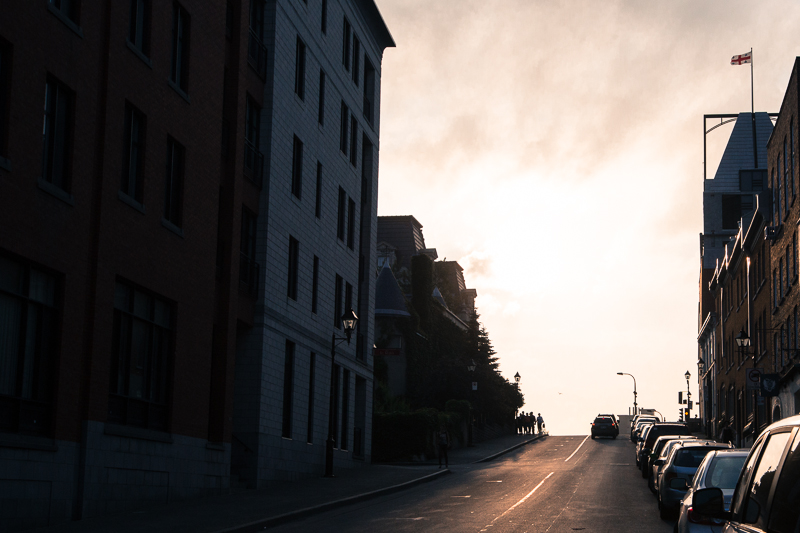
So here is the original image I took, straight out of the camera:

Yeah, a weee bit different, eh? But you still see a yellowish light on the street and light hitting the buildings on the side. I had to expose properly to make sure the dark areas in the image stayed dark to keep those silhouettes. If I would of properly exposed the buildings, then things would of been too bright in the sky and I would lose what little detail there was. You can also see how much further, and the lens I was shooting with was 35mm, so somewhat wide. Love how the light is hitting the buildings on the right, bringing out the right amount of detail.
Now, onto the first steps of processing
First thing is I played with the crop. I actually crop and re-crop many times when I process an image like this. I had first had it cropped with no cars on the right, but figured I prefer the cars as they kind of lead the eye up the street. and I like how keeping the buildings on the right help frame the overall scene. Without them, things would be empty. I then tried to crop with the people more on the left to keep that really awesome light hitting the buildings on the right, but didn’t like how the people were walking in the short edge of the frame…
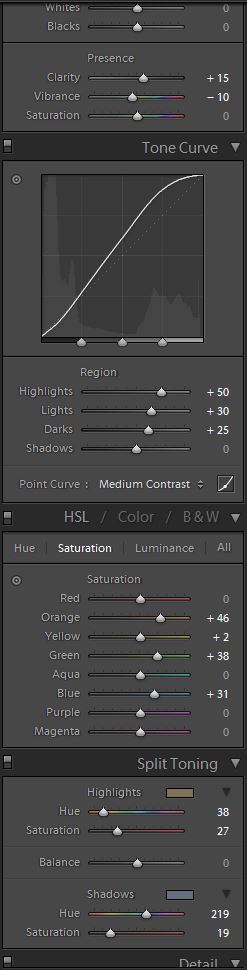
The colour in here is from a preset I made that I use often in my street images when I want to give it a kind of retro look. The basics are below, but the main part of the vibe of this preset comes from changing the colours of the highlights and shadows. Highlights end up a bit more yellow/gold and the shadows are a bit more purple. This preset was based off another preset I had downloaded a while ago.
So after applying the stuff above, the colours were coming out a bit more as I wanted. I was really starting to get a feel of something you’d see in a Walking Dead poster. The main part was getting the sky and clouds to have more drama. The great thing with shooting with a good camera is the amount of detail that is captured, but not necessarily seen. This allows to have more pixels to play with. And also, as mentioned, properly exposing the image to lose the least possible detail in the bright sky is key. There is only so much you camera can do.
Next step, working dem clouds.
I manually used the brush in Lightroom to bring down the exposure in the clouds to make them a bit darker, and then up their saturation a bit to make them stick out some (a few other local tweaks as well). I set the flow on the brush pretty low so each stroke is only a slight impact. There was also a bird flying just on top of the people in the back. Normally I would leave things like this in, but in this case, it looked more like a spec of dust. So I removed that to clean up the image.
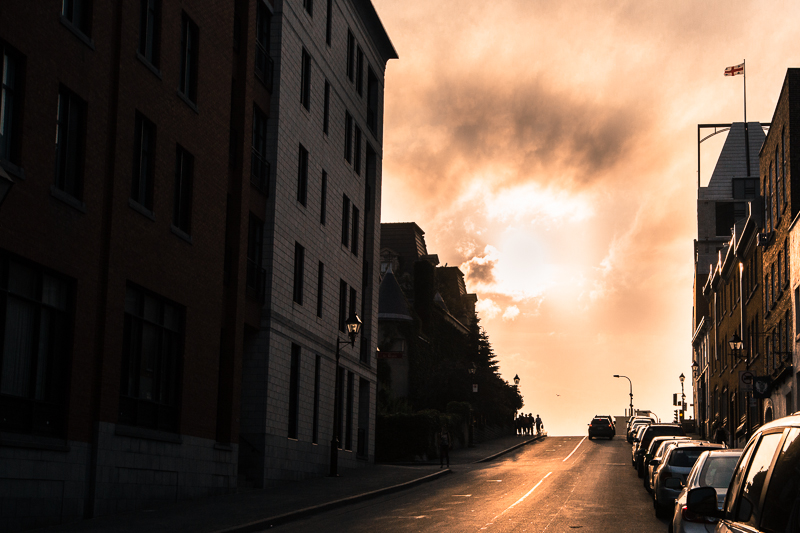
And then all that was really left was the fine tuning of the shadows to get the front most building darker, darkening the line of cars on the right so that their windows weren’t so bright, and some other slight adjustments to falvour the sauce as I like it.
Voila! Not a long time spent on the image, but enough to give it the look I was going for.
A little behind the scenes of what goes on in my mind when I see something and how I get to the final image.
– What catches your eye in the scene? Look for light sources and how that light is hitting parts of the scene. Boring flat light usually leads to boring flat images.
– Look for a human element to add some life to an image. It also helps tell a story.
– Don’t worry about processing the image, do what your eye and vision tells you. “Get it right in camera” is a popular saying, and is very true. And every great final product starts with a well done image when you click the shutter button.
Hope this was somewhat interesting! 🙂
Curious to learn more? Want to learn how to get out of those automatic modes in your camera? Shoot me a message (here or on facebook) and let’s chat. I’m always looking for new students.